This post will help you in using a new pipeline through Azure. You should know that Pipeline is very simple and enables you to transfer solutions from one environment to another; which later on can be used to publish your customizations as well. There is another thing; this post is only helpful if you have successfully configured the connection between the Power Platform environment and the DevOps environment.
How to Create your Pipeline
- The first step is to go to the Azure DevOps project and choose Pipeline.
- There you will create a New Pipeline and then click “Use the classic editor to create a pipeline without YAML”
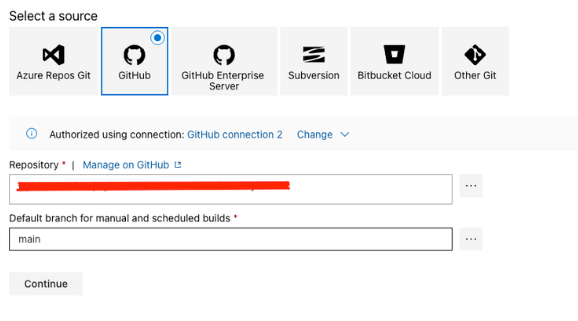
- Next, you will need to tell Azure pipelines where you have stored your repository. You can also use Azure Repo or any other Repo that befits your needs. You should know that Azure Repo is your best option out there because it is easy to configure as compared to other ones.
- The next step is to choose a template; you can also go for the option of “empty job”.


- The following step includes the addition of tasks to agent Job 1 to build a new pipeline
You need to add the following tasks to your agent job
- Power Platform Tool Installer
- Power Platform Export Solution
- Power Platform Import Solution
- Power Platform Publish Customization
- Next, you need to find the variables tab and edit the window to add a new pipeline variable.
- You can name this variable according to the solution i.e. “Solutionname” and then set the value to the name of your solution in the Dataverse environment.

- Following the step above, you need to go back to the Tasks tab and configure the added tasks
- Power Platform Tool Installer
No configurations are done in this step, you just need to add it and move to the next one!
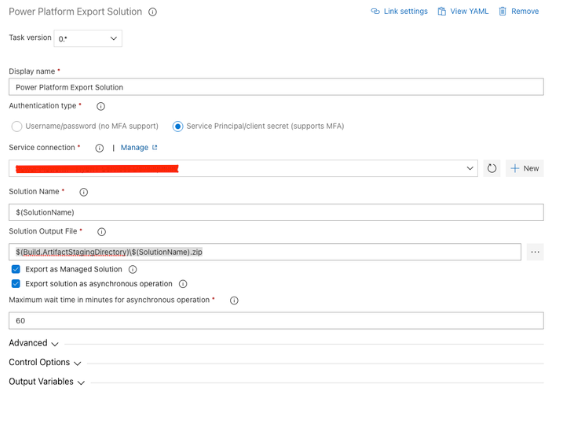
- Power Platform Export Solution
Here you will find your solution from Power Platform Environment and import it to the target environment.
- You will need to use a “Service Principal/Client secret” authentication type
- Once you are done selecting the required option; select the service connection you have configured to form a connection to the Power Platform environment
- For the solution name; use the variable you created earlier
- Next, for the solution output file, you need to use this value as $(Build.ArtifactStagingDirectory)\$(SolutionName).zip
- Next, check the box to export as a managed solution; do this if you are transferring this solution to a test or production environment; because if you move the solution to another environment this step is not needed.
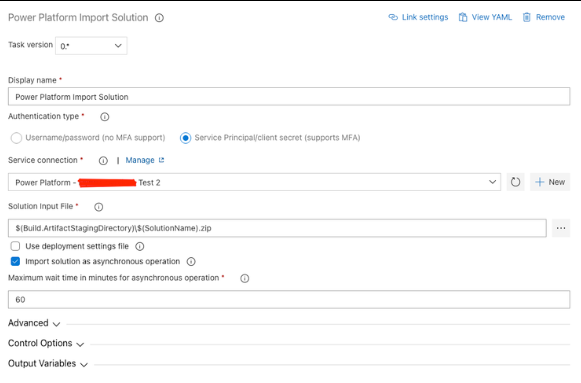
- Power Platform Import Solution

This step is very easy as you will be importing the solution to your target environment. So, select the service collect of the environment and use this value: $(Build.ArtifactStagingDirectory)\$(SolutionName).zip$(Build.ArtifactStagingDirectory)\$(SolutionName).zip
- Power Platform Publish Customization
This step is also very simple; here you just need to select the service connection of the environment which is to be imported; it will enable you to publish all the solutions XML changes in the environment.
Congratulations you are done! Make sure you save your Pipeline and do not forget to test it.


