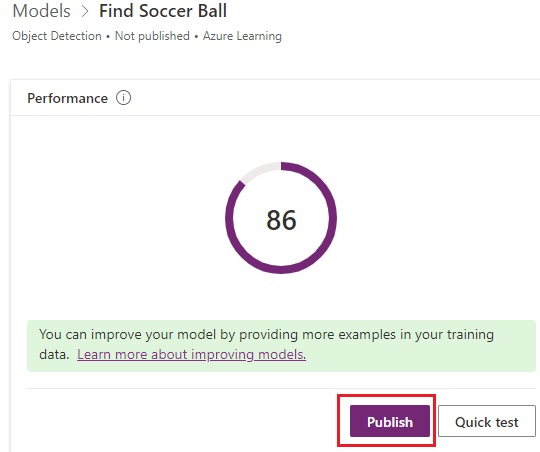
Detect, find, and identify specific objects in any image using the object detection AI model. This model may be used with Power Automation to gather data from images from any data source, including SharePoint, Data Verse, and others. Alternatively, we can create this model with the Canvas app from camera images.
We propose at least 15 photographs per object to train the model, but more than 50 images are preferable. Two objects in the same photograph can be tagged. We can, for instance, use the same image to tag a basketball and a soccer ball.
The image should be in a.jpg,.png, or.bmp format, with a maximum file size of 6 MB. In this case, AI detects the soccer ball that we trained it to detect.

Step-by-Step Instructions for Training the Model
- Visit https://make.powerapps.com to get started.
- Choose a setting

- Expand AI Builder from the left – hand menu and pick Build. Choose Object Detection from the drop-down menu.

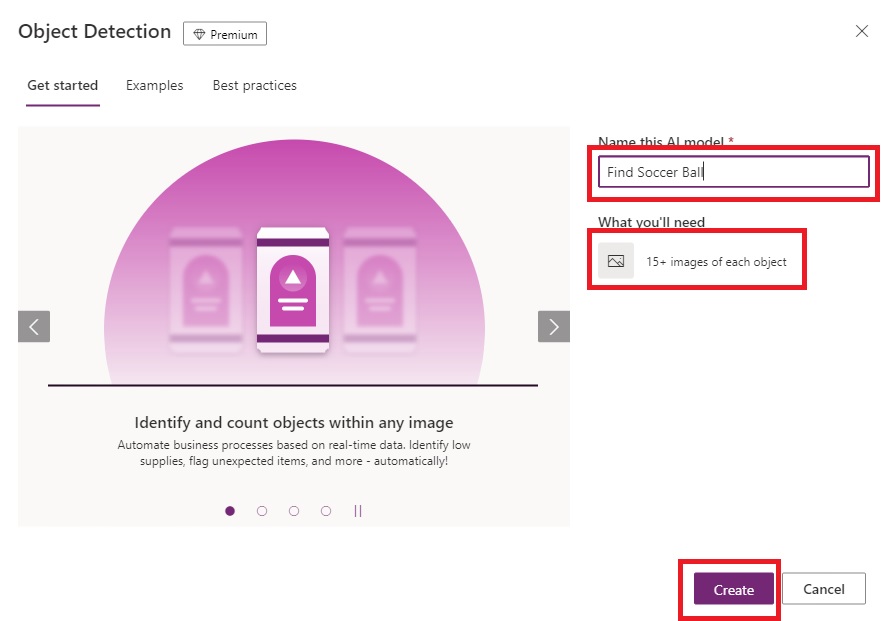
- Give your model a name and then press the Create button. Each object should have at least 15 images.
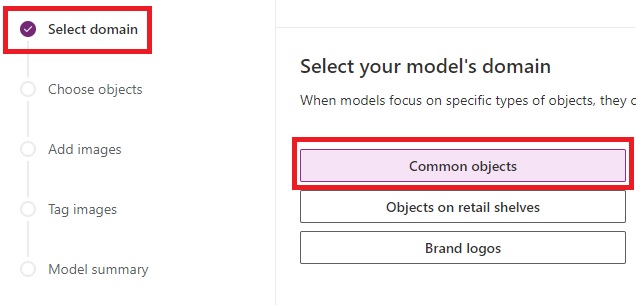
- Choose the domain that defines the object categories. This option does not have to be exact. Selecting common things in our scenario.
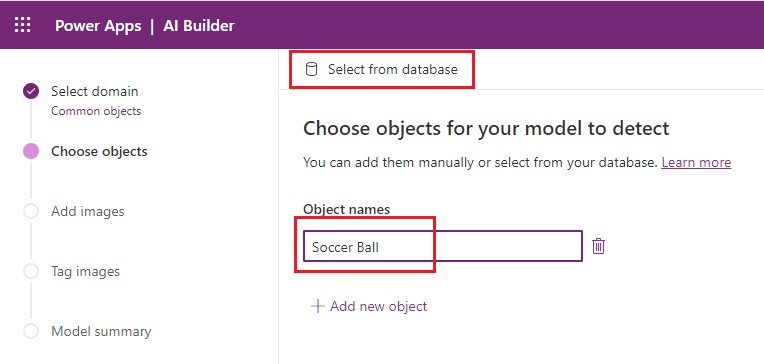
- Make a list of object names for our model to recognise. In our situation, there is only one option, which is “Soccer Ball.” We can undoubtedly locate or notice a wide range of objects. To continue, click next.
Instead of inputting each object name individually, we can add them from the database.
- Insert images to train. A minimum of 15 pictures are required for each object. However, I suggest getting between 30 and 50 photographs. More examples in your training data could help us enhance our model.
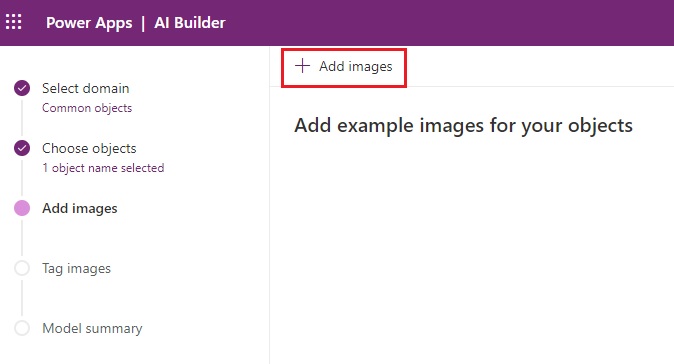
- Press “Next” once your uploads are complete.
- Hover your mouse over the highlighted selection or select a specific region to double-check the objects.
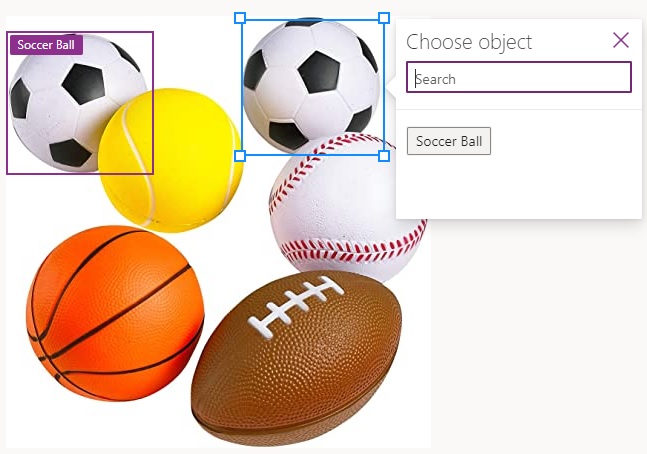
- Select “Done Tagging” on the top right hand corner after you ‘ve completed the selection of all objects on all pictures.
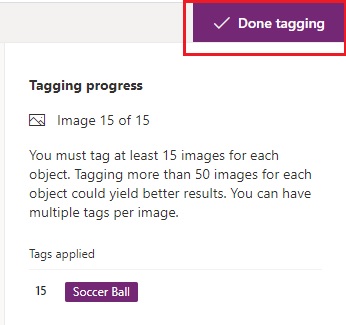
- After that, click “Next” and then “Train.” The model will begin training right away.
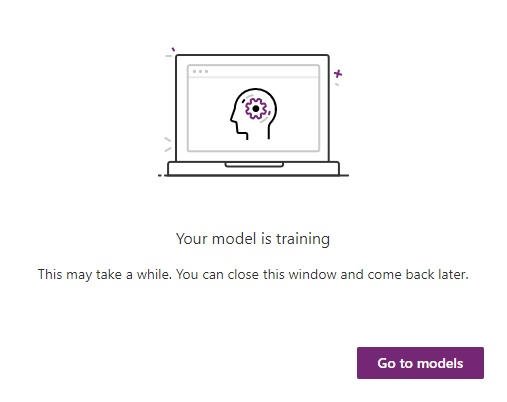
- Hold until the model has been trained. Find and open the models you’ve saved.

- On the prototype, choose “Quick test.”
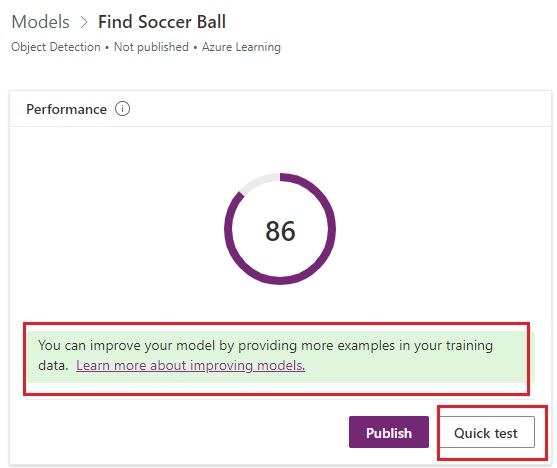
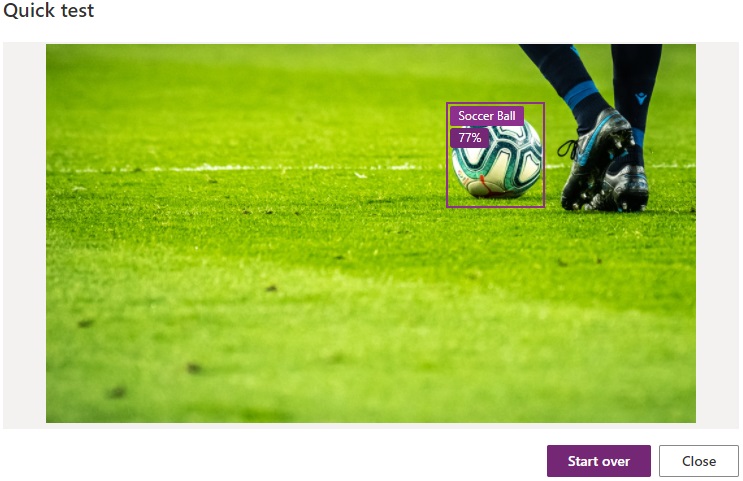
- Close the window and submit the model for publication.
