PowerApps CLI provides various features to help with our daily activities, but, in my opinion, the most useful has to be the command “Pac-plugin init.”
Let’s look into it:
- Authentication
- Solution commands to do export, and
- Commands to do imports
Keep up with me and You will figure out how to do it all by yourself.
Installing

For starters, follow these 3 simple steps below.
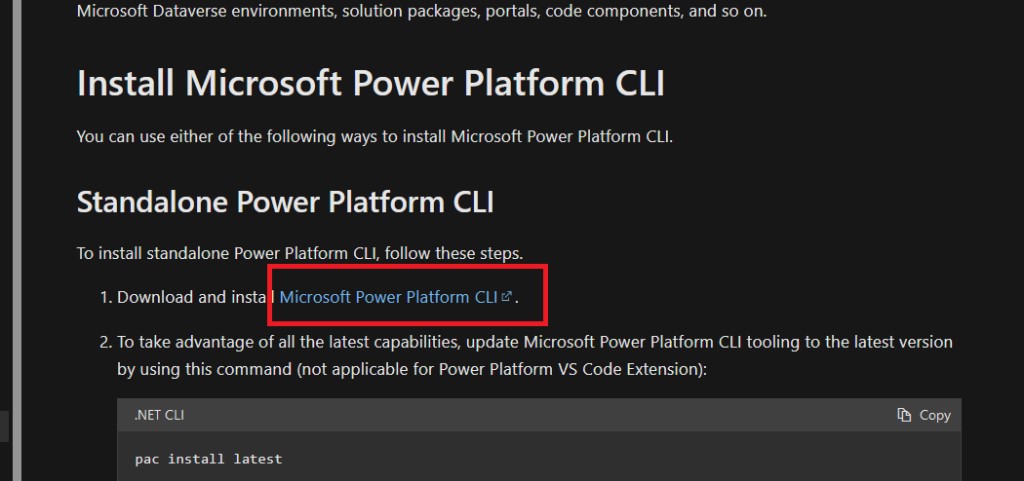
- Download the PowerApps CLI. I am mentioning the link here for you.
- Open the command prompt.
- Now, run the “pac” command and wait for a response.
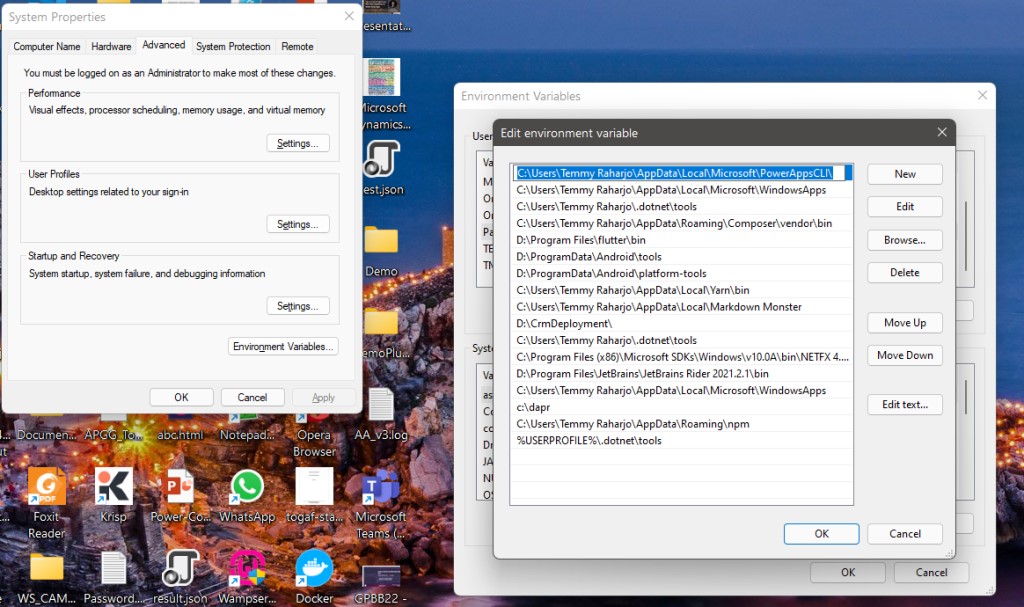
If, by chance you do not receive a response, then you can follow my effortless way of setting Environment Variables on your machine.
- Type “Edit environment Variables” on the start button. System Properties will automatically pop up.
- Click on the “Environment variables” as shown below in the image.

Authenticating
Before proceeding further with export/import, I will tell you how to connect with the environment of your choice.
The first thing is to add a connection to the Dataverse environment. For this, you just need to click on the command prompt and type the following command:
pac auth create –name powermvps1 –url https://yourcrmurl.crm.dynamics.com –username yourusername@yourdomain.com –password yourpassword
You will get the response only if your setting is appropriate and correct. After that, you can run the command pac-auth list to see your connected Environments.

In the image above, you can observe that the active environment is index no 2. So now every command which you will run will be in this environment.
You can also change the environment if you want to. For example, you can set insurgo2 as the active environment by simply running the command “pac-auth select –index 1”.
Export Solution
Once you are done with the steps I have mentioned above, get ready for some export by running the command below:
pac solution export –path d:\\Solutions\Blog_Unmanaged.zip –name blog –managed false –include general
Now there are various parameters to this, which you can learn here. I will tell you one of the easiest methods. Once you are connected to your environment:
- Select a Solution that you want to export.
- After that you will click on Export.
- Next, you will publish and run.
- Then, you need to select managed or unmanaged, which is based on which environment you plan to migrate your solution to.
- And finally, you simply export.
Import Solution
Finally, the last thing to learn is how to import a solution. For this, you just need to import the following command:
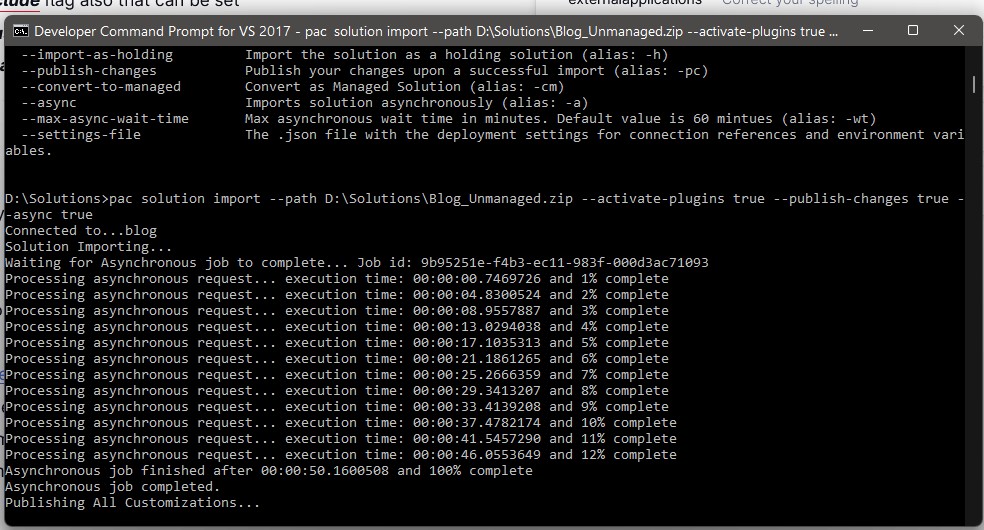
pac solution import –path D:\Solutions\Blog_Unmanaged.zip –activate-plugins true –publish-changes true –async true
And this is what you will see once you are done importing.

Just like export, there are lots of parameters to import as well, which you can learn here.
One of them is to convert-to-managed parameters. This allows you to convert unmanaged components to a managed state.
Then there is the activate-plugins parameter which activates the plugins once you are finished importing.
Final Take
Surely, Export and import solutions gives you a better application lifecycle management for integration. I am sure this short guide will aid you with Export/Import solutions easily.
Let me know your thoughts.


