About the Author: Manish Luhana
This blog post will explain how to use Power Automate and PowerApps to manage a multi person field in Sharepoint.
The context
You might have a multi-select user in PowerApps that you wish to transmit to Power Automate for additional corporate activities like authorization or data transfer. You also need to add a Create SP List item to your checklist.
Employing PowerApps or Power Automate, multi-select is usually a unique and complex task. If we integrate both, it presents us with greater obstacles.
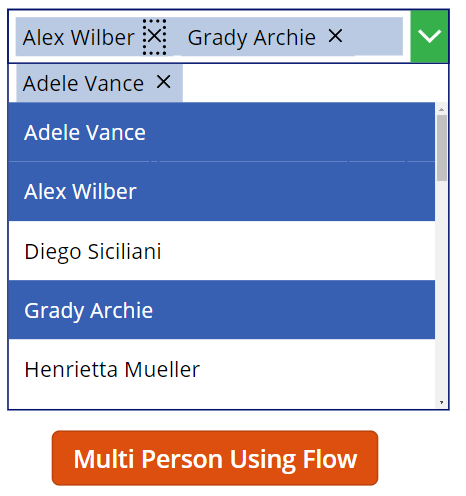
UI for PowerApps
Initiate the Flow
FlowName.Run(Concat(ComboBoxMultiSelectPerson.SelectedItems.Mail, Text(Mail) & “;”))
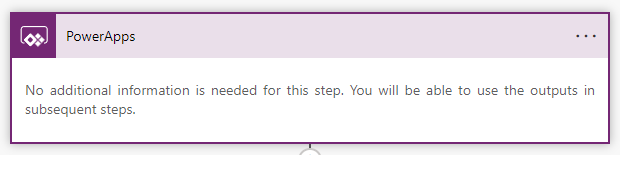
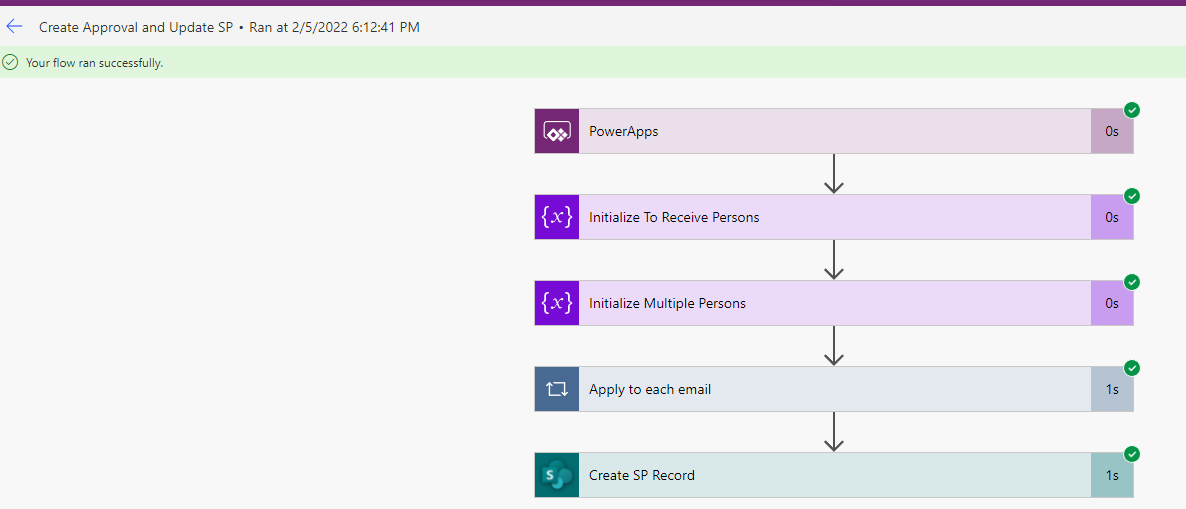
All actions are Power Automated (Flow)

Description of Power Automated Actions
- Establish an immediate cloud flow, assign it an identifier, and choose the ‘PowerApps’ trigger as displayed below.
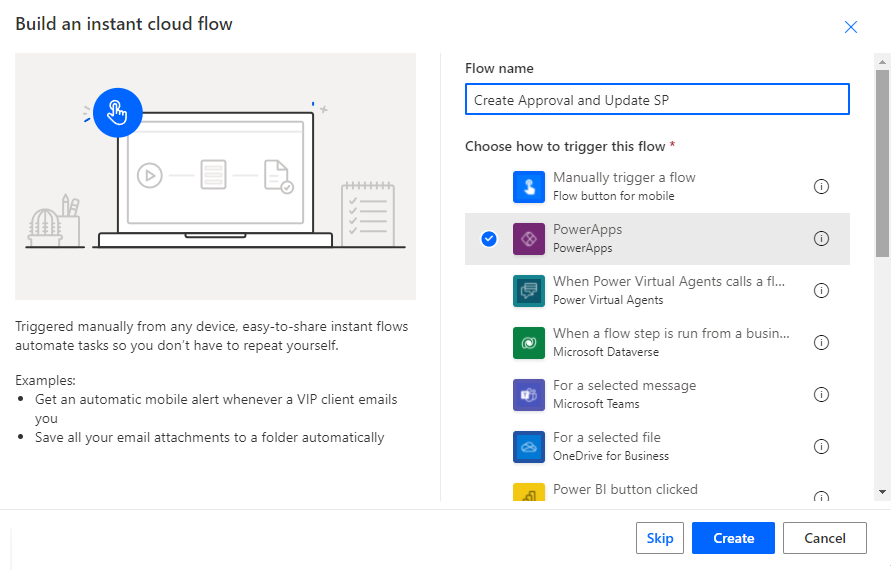
- It generates a trigger action similar to the one seen below.
Create an activity called “Initialise Variable” using the parameters listed beneath. These variables will hold the PowerApps data.
- Selected Persons in PowerApps – Name
- Place the cursor on the Value and click “Ask in PowerApps” Type – String Value – Place the pointer on the Value and click “Ask in PowerApps”

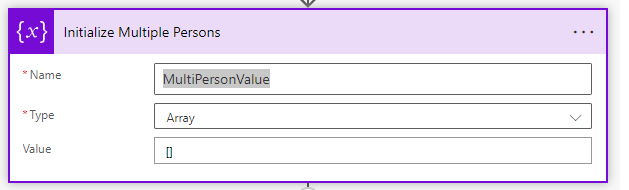
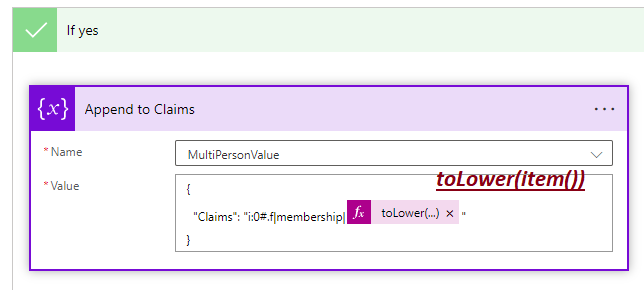
- Create a new action called “Initialise Variable” and give it the properties listed below. This variable holds all claims from the multi-person field.
- Type – Array Value – [] Name – MultiPersonValue
- Using the divide method, create an action called “Apply to each,” which will loop through each mail.
- Add a check to ensure the email isn’t empty.
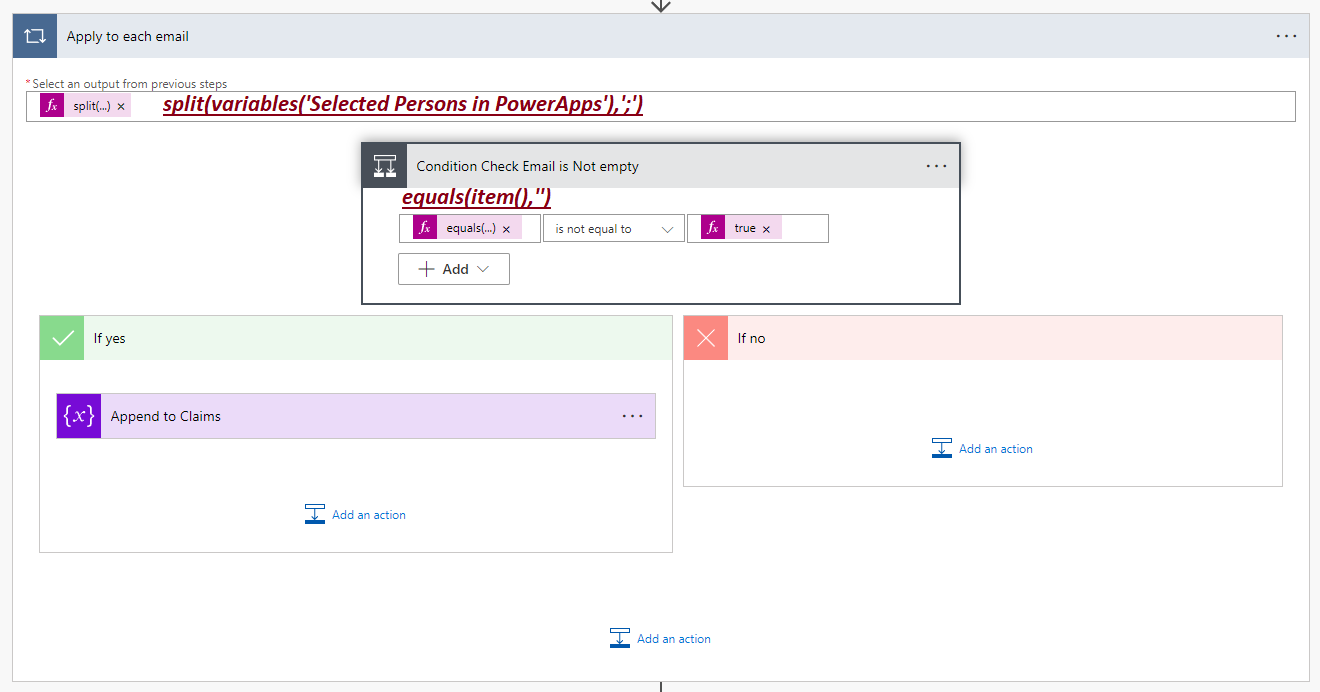
- Create an action called ‘Append to array variable’ and set the claims for each email.
“Claims”: “i:0#.f|membership|@{Microsoft 365(item())}”
- We must send the values below to the Add Item action to modify the multiselection’s person column.
[
{
“Claims”: “i:0#.f|membership|microsoft 365.com”,
},
{
“Claims”: “i:0#.f|membership|microsoft 365.com”
}
]
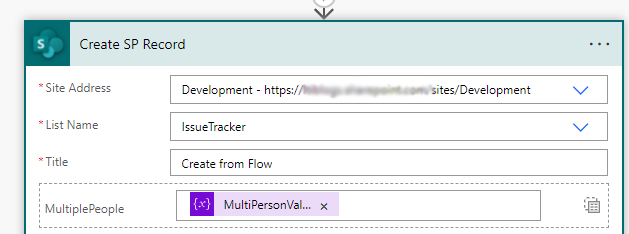
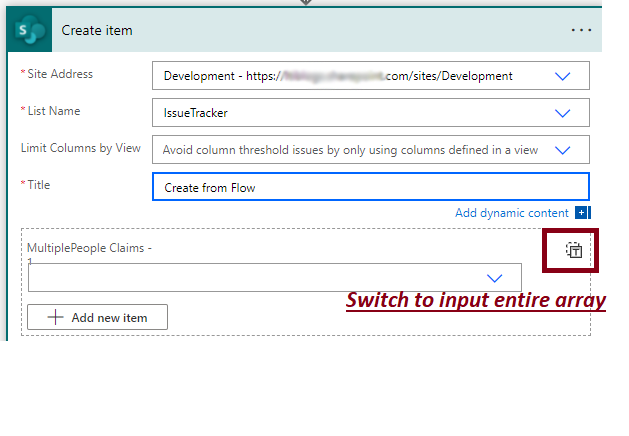
‘Create item’ should be added as an action.
- SharePoint Site Collection – Site Address
- SP – List Name Name of the list
- Fill in all required fields.
- Choose MultiPersonValue on a specified multi-selection field for the Person field.
- Change the input mode to Input the whole range. To allocate your collection variables to the field, follow the instructions below.
Conclusion
We can use PowerApps to contact Power Automate and update multiple people in SharePoint.
Thank you for taking the time to read this!