About the Author: Manish Luhana

Creating and updating bulk records enables you to operate on several records at the same time. Here are a few circumstances in which you might wish to mass update records:
You have a large number of photographs and wish to upload them all at once.
You wish to submit a time sheet including a week’s worth of data all at once.
You might also generate new records in bulk. For example, if your app must choose a large number of photographs, you may wish to submit them all at once.
Depending on your situation, this article will describe how to edit or generate bulk records.
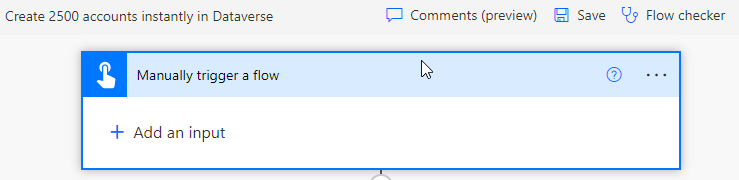
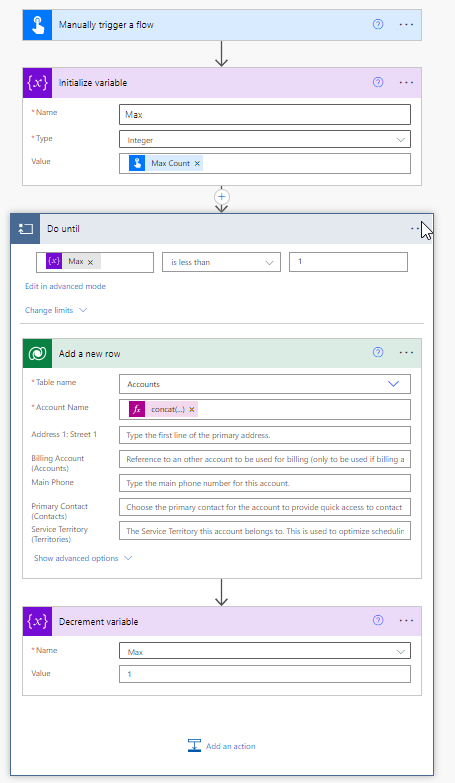
1. Sign in to power Automate and create a quick flow.
To begin, sign in to Power Automate at the URL https://flow.microsoft.com/. Then select the appropriate environment. Create an Instant cloud flow by naming it “Create 2500 accounts instantaneously in Data verse” and choosing Manually button click the trigger.
2. Add an Input parameter that allows you to choose the maximum number of records to pass.
Now, add an input parameter of type Number and give it the name Max Count.
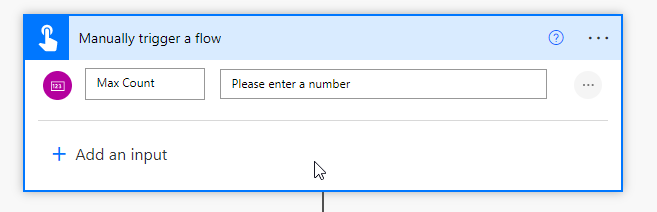
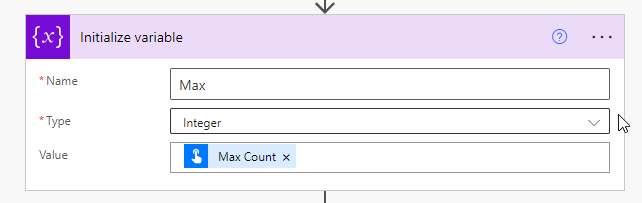
Save the input parameter as “Max” in a variable.
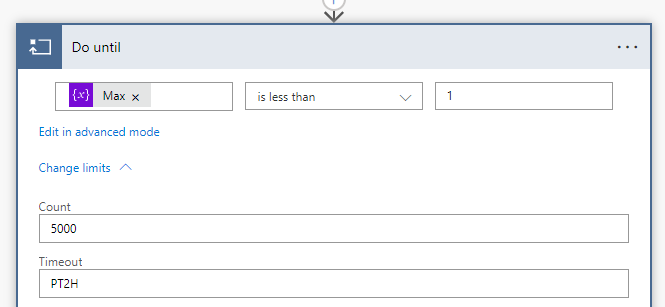
3. Using the control connection, add an action do.
After declaring the variable, add an action do till by choosing the control connection. Now, in the condition, choose Max is less than one, and in the change limit option, enter 5000 and Time Out PT2H.
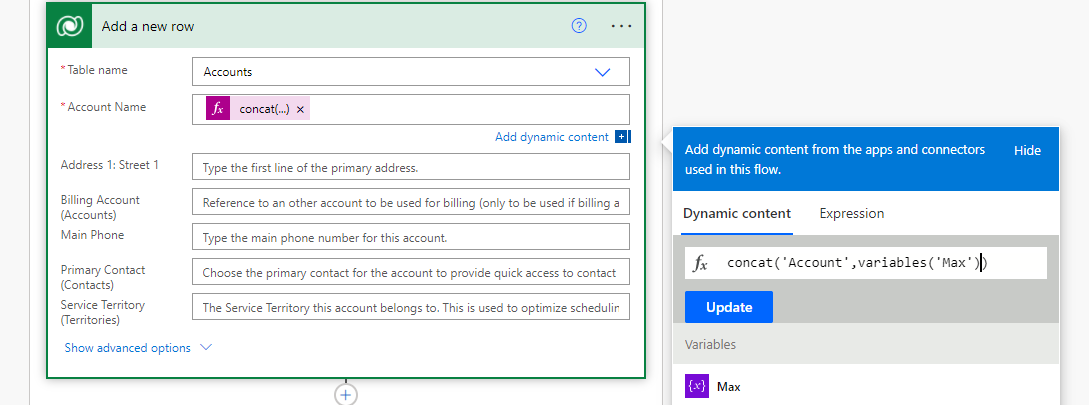
4. Inside do Until, use the Data verse connection to add an action to Add Row.
Add an action, create a new row, connect to Data verse, choose the table as Account, and enter the following expression in the Account Name box.
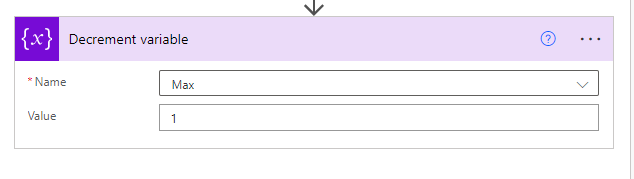
5. Create a new action to decrement the variable by one.
In order to decrease by one1, add an action variable.
It is now completed. The final flow will be as shown below.
Hope this is helpful.